Total Nitrogen: A Measure of Nutrient Enrichment
Nitrogen is an essential plant nutrient found in fertilizers, human and animal wastes, yard waste, and the air. About 80% of the atmosphere is nitrogen gas. Nitrogen gas diffuses into water where it can be “fixed” (converted) by blue-green algae to ammonia for algal use. Nitrogen can also enter lakes and streams as inorganic nitrogen and ammonia. Because nitrogen can enter aquatic systems in many forms, there is an abundant supply of available nitrogen in these systems. The three common forms of nitrogen are:
Nitrate (NO3-) – Nitrate is an oxidized form of dissolved nitrogen that is converted to ammonia by algae under anoxic (low or no oxygen) conditions. It is found in streams and runoff when dissolved oxygen is present, usually in the surface waters.
Ammonia (NH4+) – Ammonia is a form of dissolved nitrogen that is readily used by algae. It is the reduced form of nitrogen and is found in water where dissolved oxygen is lacking such as in a eutrophic hypolimnion. Important sources of ammonia include fertilizers and animal manure. In addition, ammonia is produced as a by-product by bacteria as dead plant and animal matter are decomposed.
Organic Nitrogen (Org N) – Organic nitrogen includes nitrogen found in plant and animal materials and may be in dissolved or particulate form.
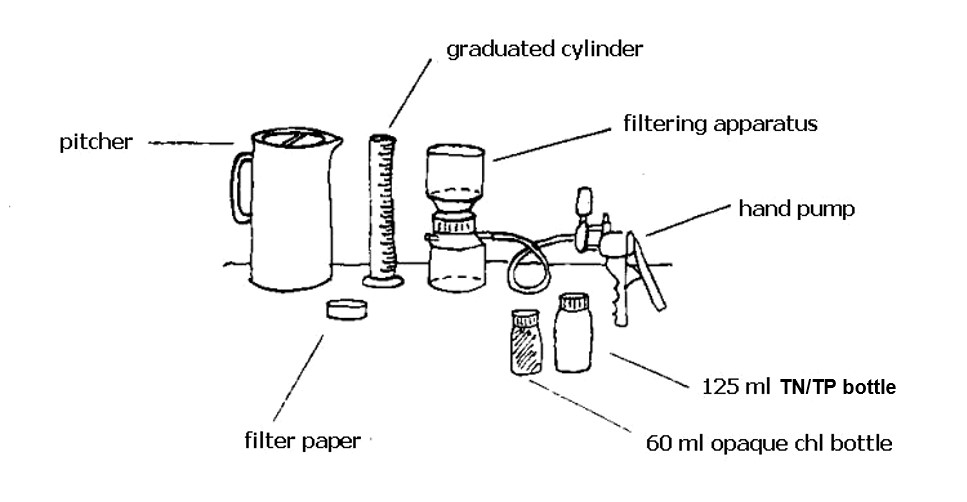
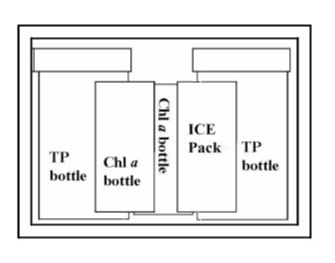
Total nitrogen (TN) is the sum of nitrogen from nitrates, ammonia, and organic forms. We began sampling for TN in 2018. TN is determined from the same sample taken for total phosphorus (TP). TN and TP are the most common nutrient measures used by environmental managers to determine nutrient enrichment.
Total Phosphorus: A Measure of Nutrient Enrichment
Phosphorus is often the key nutrient in determining the amount of phytoplankton (algae) in a lake. In comparison to other nutrients, phosphorus is usually the first element to limit biological productivity. Most of the phosphorus in lakes occurs in two forms: dissolved phosphorus and particulate phosphorus. The determination of dissolved phosphorus is a measure of the inorganic form of phosphorus available to algae. The determination of total phosphorus is a measure of all forms of phosphorus potentially available to algae.
Phosphorus enters a lake from rainfall, incoming streams, overland runoff, groundwater, and direct discharges. Phosphorus is also contributed to lakes from decomposition of organic matter and the erosion of soils. Phosphorus in the lake sediments may be released into the water under anoxic (no oxygen) conditions. Phosphorus is contributed to a lake by human activity in the watershed, direct discharge of wastes, runoff from agriculture, or poorly maintained septic systems.
Phosphorus is often the limiting nutrient in freshwater systems because it is unavailable from the atmosphere and rapidly recycled and converted to forms unavailable to algae. As the limiting nutrient, any addition of phosphorus can stimulate more algae growth.
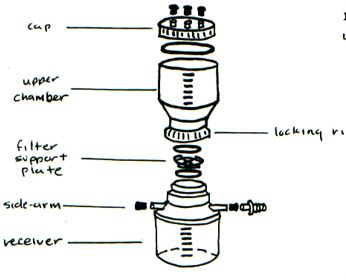
To sample for total phosphorus, a water sample is collected every month throughout the growing season in a specially cleaned bottle and then analyzed in the laboratory.
Chlorophyll a: A Measure of Lake Productivity
Chlorophyll a is the photosynthetic pigment that causes the green color in algae and plants. The concentration of chlorophyll α present in the water is directly related to the amount of algae living in the water. Excessive concentrations of algae give lakes an undesirable “pea soup” appearance.
The water quality characteristics of a lake largely determine which types of algae will be present. Lakes with high nutrient enrichment will tend to support larger numbers of algae than lakes with low nutrient enrichment. Other factors such as water temperature, depth, pH, and alkalinity also influence the species and numbers of algae found in a lake.